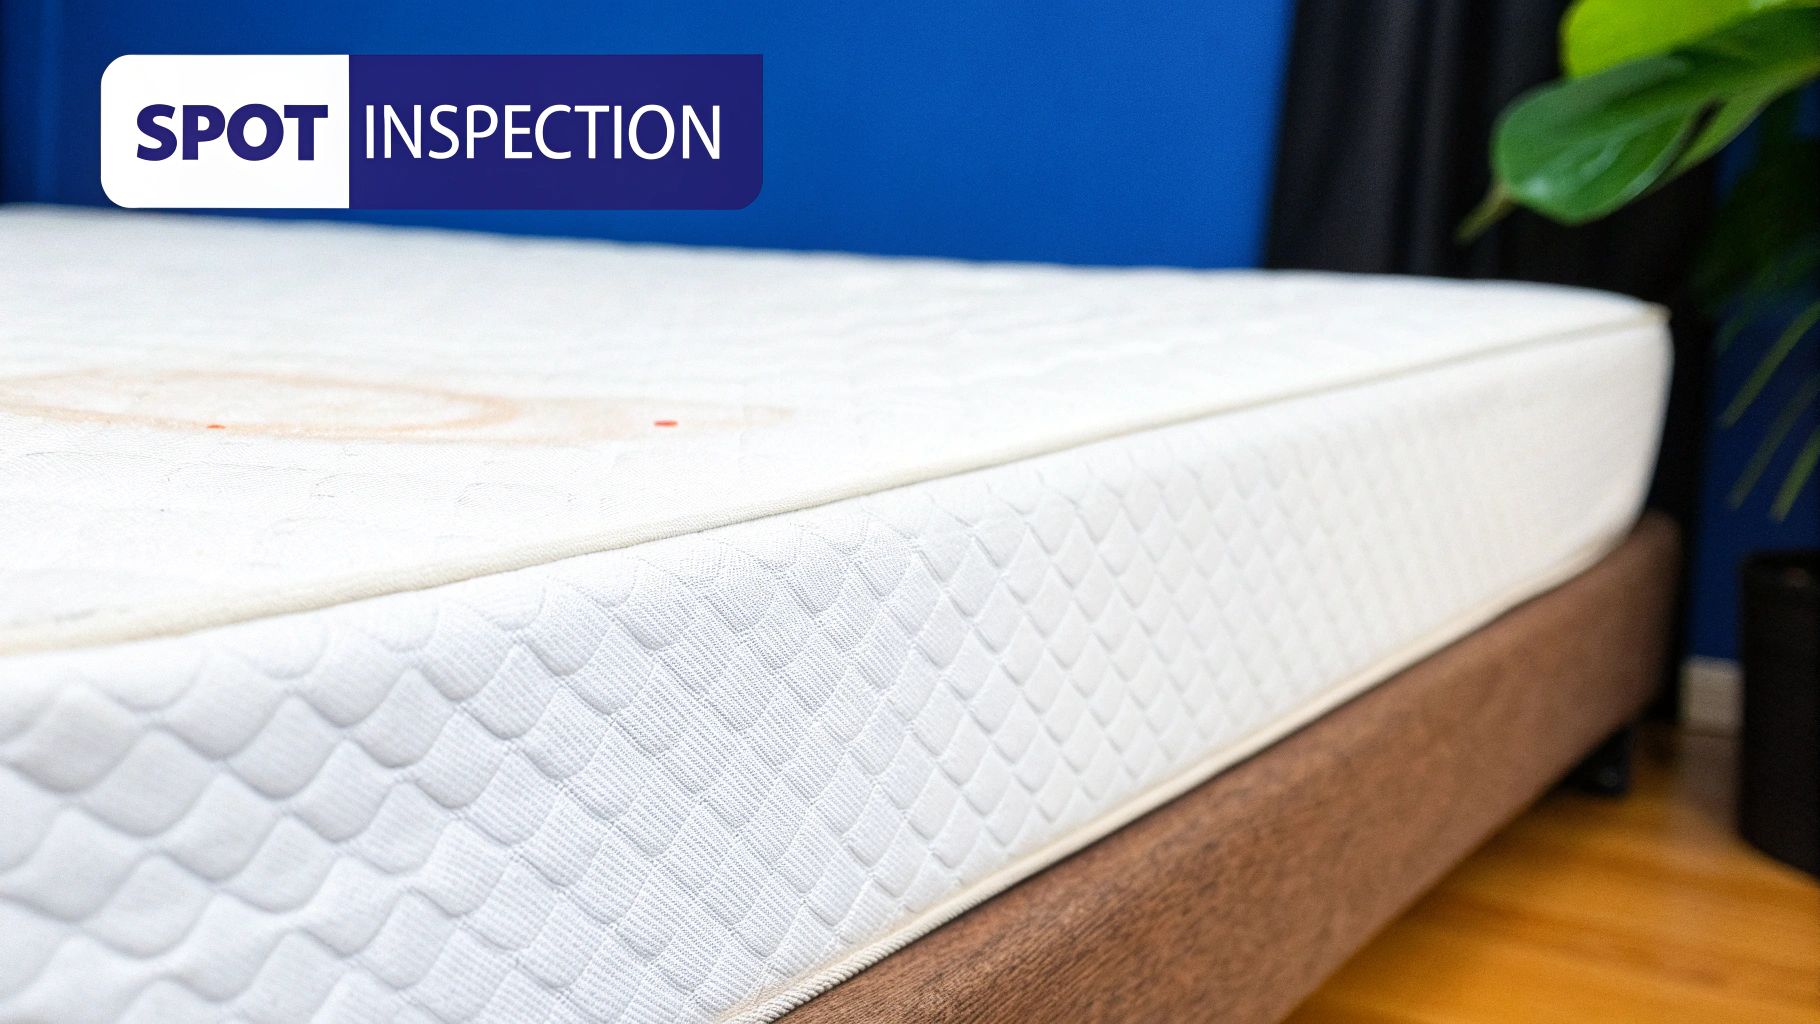
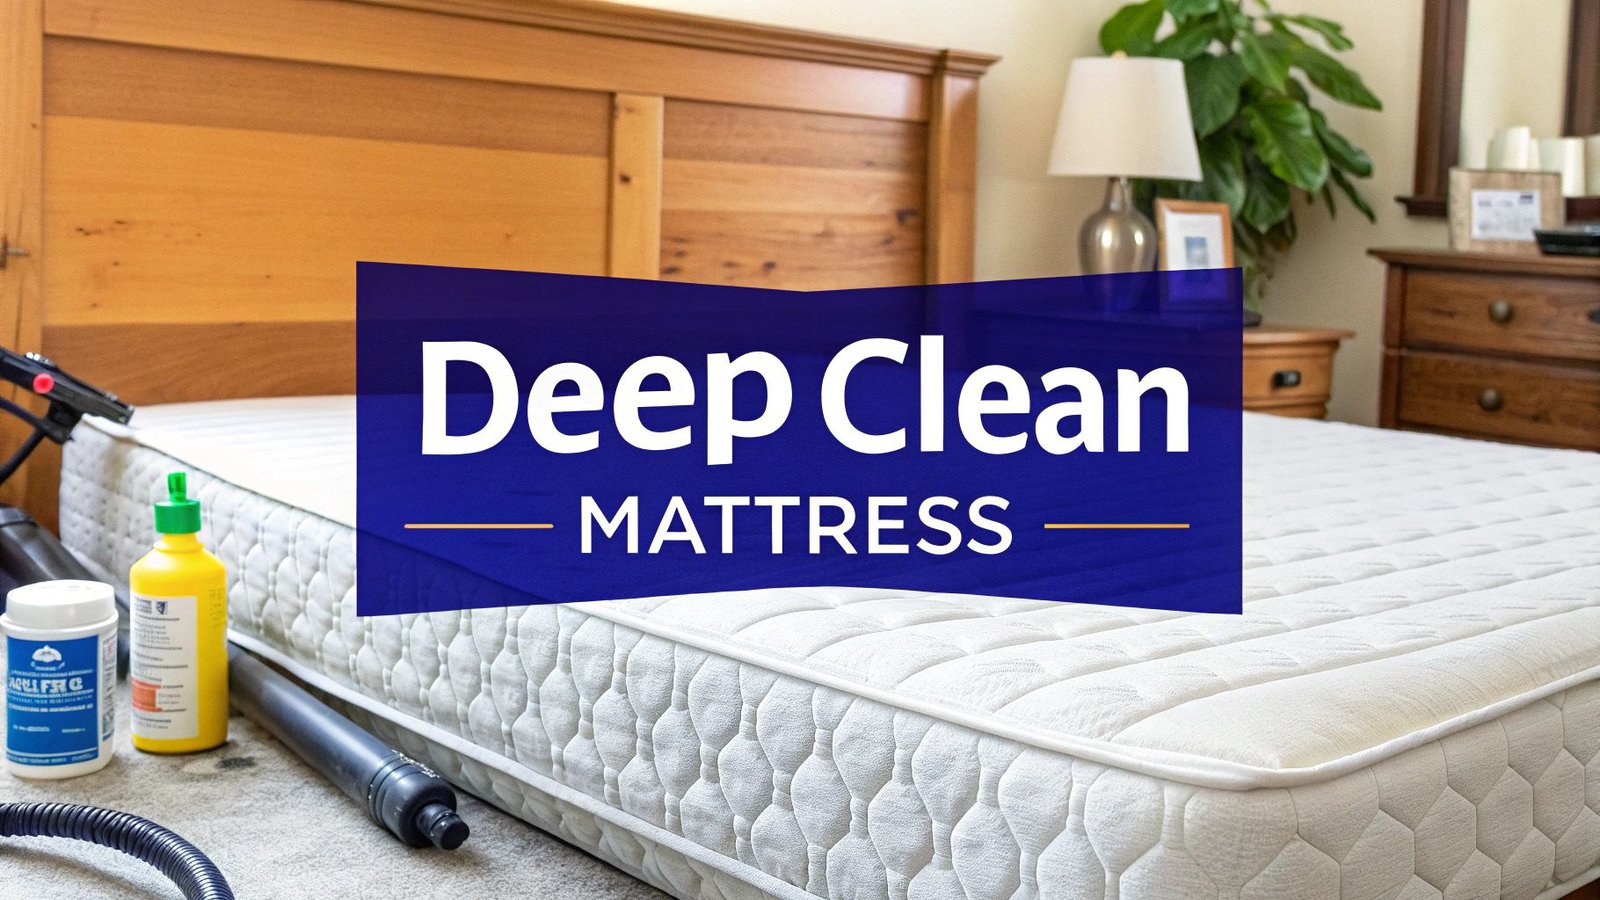
How to Clean Urine from a Mattress – Professional Tips

When you find a fresh urine accident on your mattress, you need to act quickly. The first thing to do is grab a clean, dry cloth and blot the spot. Don’t rub! Just press down firmly to soak up as much of the liquid as you can.
After that, a simple mix of equal parts white vinegar and water in a spray bottle works wonders. Lightly mist the stained area, then sprinkle a good amount of baking soda over it to start tackling the odour. This is a really effective first response to clean urine from a mattress and can stop a stain from setting in for good.
My 15-Year Mission for Cleaner Mattresses in Melbourne
For over 15 years, my work has been dedicated to providing a top-notch mattress cleaning service to the people of Melbourne and its sprawling suburbs. For me, this is more than just a business. It’s a genuine mission driven by my priority to deliver an exceptional mattress stain removal service. I’ve put my heart into this, and my hands-on experience and training in this field are, I believe, second to none.
In that time, I’ve seen it all. I’ve dealt with every kind of stain and odour you could possibly imagine. From a toddler’s potty-training accident in Brighton to a cherished pet’s little mistake in Fitzroy, I know the immediate panic these moments can bring. This guide is the culmination of everything I’ve learned on the job, day in and day out.
A Dedication to Every Melbourne Suburb – How to clean urine from a mattress
My commitment covers the entire Melbourne area. It doesn’t matter if you’re in a bustling inner-city spot like Richmond or South Yarra, or out in family-friendly communities like Point Cook or Craigieburn—my objective is always the same. I want to provide effective, reliable solutions for anyone who needs to get urine out of their mattress, and my service is available to all of Melbourne’s suburbs.
What I’ve learned is that while every mattress and every accident is a little different, the basic principles of a thorough, effective clean don’t change. That’s why I want to pull back the curtain and share the professional techniques I use every single day.
My focus has always been on empowering homeowners. By sharing my knowledge, I hope to give you the confidence to handle accidents effectively, protecting your mattress and ensuring a healthy sleeping environment for your family. Keep reading on to discover how to remove urine from a mattress.
Ignoring a urine stain is a bigger deal than most people realise. The health and financial costs of leaving it untreated can really add up. Urine doesn’t just stain; it introduces contaminants that can lead to health problems like respiratory issues or skin irritation, especially from the ammonia. Financially, an untreated stain will permanently damage the fibres of your mattress, often meaning you have to buy a new one far sooner than you should. You can find more details about these risks at cleancare.com.au.
Why Professional Experience Matters
Throughout this guide, I’ll be sharing the simple tools and proven methods that get real results, all drawn directly from my years of work across Melbourne. My expertise is second to none, and my goal is to help you get your mattress truly clean and fresh, no matter where you live in this great city. Let’s get started on bringing your mattress back to its best.
What to Do in the First 15 Minutes
The moment you find a fresh urine spot on your mattress, the clock starts ticking. What you do in these crucial first few minutes makes all the difference between a simple clean-up and a battle with a stubborn stain and smell that just won’t quit. I’ve seen this exact scenario play out thousands of times across Melbourne, and I can tell you that quick, correct action is everything.
Your first thought might be to grab a wet cloth and give it a good, hard scrub. Please, don’t do it. Scrubbing is the absolute worst thing you can do. It only forces the urine deeper into the mattress fibres and foam. Once it’s pushed down in there, getting it out completely becomes a much, much bigger job.
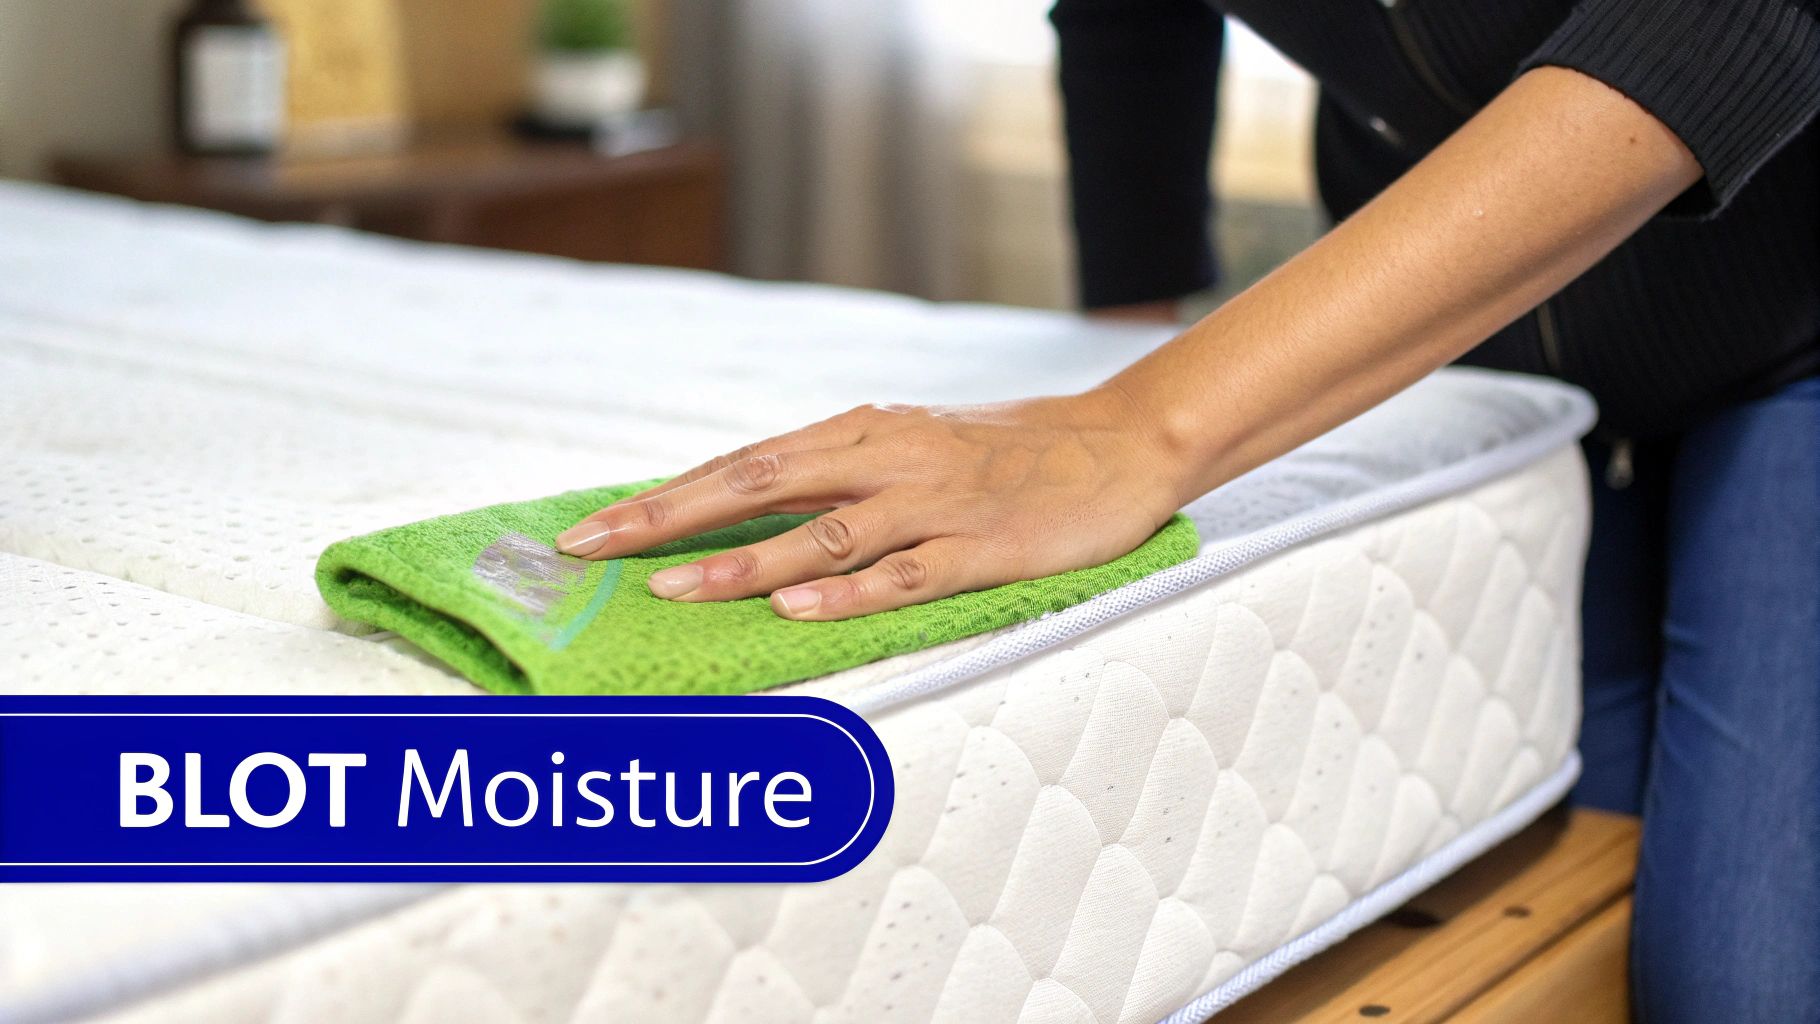
The Blotting Technique I Use on Every Job
Instead of scrubbing, your only goal right now should be absorption. This is the very first thing I do on every job, whether it’s a small accident at a family home or a bigger problem in a commercial setting. It’s a simple, non-chemical step that’s all about physics, and honestly, it’s the most important one.
Here’s what you’ll need:
- A stack of clean, dry cloths or thick paper towels.
- A bit of patience and some firm pressure.
Start by laying a thick layer of paper towels or a folded dry cloth over the entire wet patch. Now, press down firmly and evenly with the palms of your hands. Don’t wipe or rub. Just press. You’ll literally see the liquid being drawn up into the towel.
My Pro Tip: As soon as the first cloth or paper towel is damp, get rid of it and grab a fresh, dry one. Keep doing this—blotting with firm pressure—until a new cloth comes away pretty much dry. That’s your sign that you’ve pulled out as much of the liquid as you possibly can.
This initial blotting is what sets you up for a successful deep clean later. By lifting the liquid out straight away, you’re stopping it from breaking down into uric acid crystals—that’s the stuff that causes that sharp, lingering smell.
Of course, understanding common challenges like potty training accidents can help prevent them from happening in the first place. But when they do, this blotting method is your best first line of defence. For a full rundown of what comes next, have a look at our complete guide on how to get stains out of a mattress. Getting this first step right is your best shot at stopping a stain from becoming a permanent resident.
Making Your Own Professional-Grade Cleaning Solution
Forget those pricey, store-bought sprays. After more than 15 years in this business, I’ve learned they often just hide odours with strong perfumes instead of actually solving the problem. You really don’t need a cupboard full of harsh chemicals to properly clean urine from a mattress; you just need to get the basic chemistry right.
The real enemy here is uric acid. This is the stuff in urine that doesn’t just dissolve in water. As it dries, it forms sharp little crystals, and those crystals are what release that pungent ammonia smell, especially when the air gets a bit humid. To get rid of them for good, you need to break them down with an acid.
My Go-To DIY Recipe – How to clean urine from a mattress
My personal, professional-grade recipe is about as simple as it gets, using things you almost certainly have in your pantry right now. This is the exact mix I tell my clients to use for fast, effective results.
It’s a straightforward blend of equal parts plain white vinegar and water. That’s it. Just pour this into a clean spray bottle, give it a good shake, and you’re ready to go. The acetic acid in the vinegar is perfect for neutralising the alkaline nature of urine, dissolving those smelly uric acid crystals on a chemical level.
Why This Simple Vinegar Solution Works So Well
The real magic here is in the acidity. Urine is alkaline, so when you introduce an acidic cleaner like vinegar, it triggers a chemical reaction that neutralises the pH. This process doesn’t just mask the smell—it completely dismantles the source of the odour.
Over the years, I’ve seen countless homeowners reach for ammonia-based cleaners, which is a massive mistake. Urine already contains ammonia. Adding more only makes the odour worse and can even encourage pets to mark that spot again.
People often ask about the vinegar smell. Yes, it’s noticeable at first, but that scent completely disappears as it dries, and it takes the urine odour with it. It’s a small, temporary trade-off for a permanent fix. If you’re really sensitive to the smell, adding a few drops of a gentle essential oil like lavender can help, but honestly, I rarely find it’s needed.
The biggest mistake I see people make is drenching the mattress. You only need to lightly mist the affected area. Soaking it will force moisture deep into the foam, creating the perfect breeding ground for mould and mildew—and that’s a whole other headache you don’t want. A light, even spray is all it takes to let the solution do its job without causing more problems down the track.
To give you a better idea of what works and what doesn’t, here’s a quick comparison of the common household ingredients I see people trying to use.
DIY Urine Cleaning Solution Comparison
I’ve seen all sorts of DIY concoctions over the years. Some are genuinely helpful, while others can make the problem much, much worse. This table breaks down the most common ingredients based on my hands-on experience.
| Ingredient | Effectiveness on Odour | Effectiveness on Stains | My Professional Advice |
|---|---|---|---|
| White Vinegar | Excellent | Good | My top recommendation. Its acidity neutralises the alkaline urine and breaks down uric acid crystals effectively. |
| Bicarbonate of Soda | Excellent | Fair | Best used as a deodoriser after a liquid treatment. It’s fantastic for absorbing any leftover moisture and smells. |
| Hydrogen Peroxide | Good | Excellent | Very effective on stains but can bleach fabrics. Only use on white mattresses after a patch test in a hidden spot. |
| Ammonia-Based Cleaners | Poor | Poor | Avoid at all costs. It has a similar chemical profile to urine and will only intensify the odour problem. |
As you can see, simplicity wins. Sticking with the right tools for the job—vinegar for neutralising and bicarb soda for deodorising—will give you the best shot at a successful clean without risking damage to your mattress.
The Complete Application and Drying Method
Having the right cleaning solution is a great start, but how you apply it is what truly separates a temporary fix from a professional result. After countless jobs across Melbourne, I’ve refined an application method that tackles both the stain and the odour without causing secondary problems like mildew.
The key is control. That’s why your best tool for the job is a simple spray bottle. It allows you to apply the vinegar solution as a fine, even mist over the affected area. Your goal is to dampen the stain, not to soak the mattress. Soaking drives liquid deep into the mattress layers, which can trap moisture and create a musty smell later on—a problem I’m often called in to fix.
The Dwell, Deodorise and Dry Technique
Once you’ve lightly misted the stain, you need to be patient. Let the solution sit for about 10-15 minutes. This “dwell time” is crucial; it gives the vinegar’s acid the time it needs to work on a chemical level, breaking down and neutralising those stubborn uric acid crystals. After it has sat for a bit, blot the area one last time with a clean, dry cloth to lift away any excess moisture.
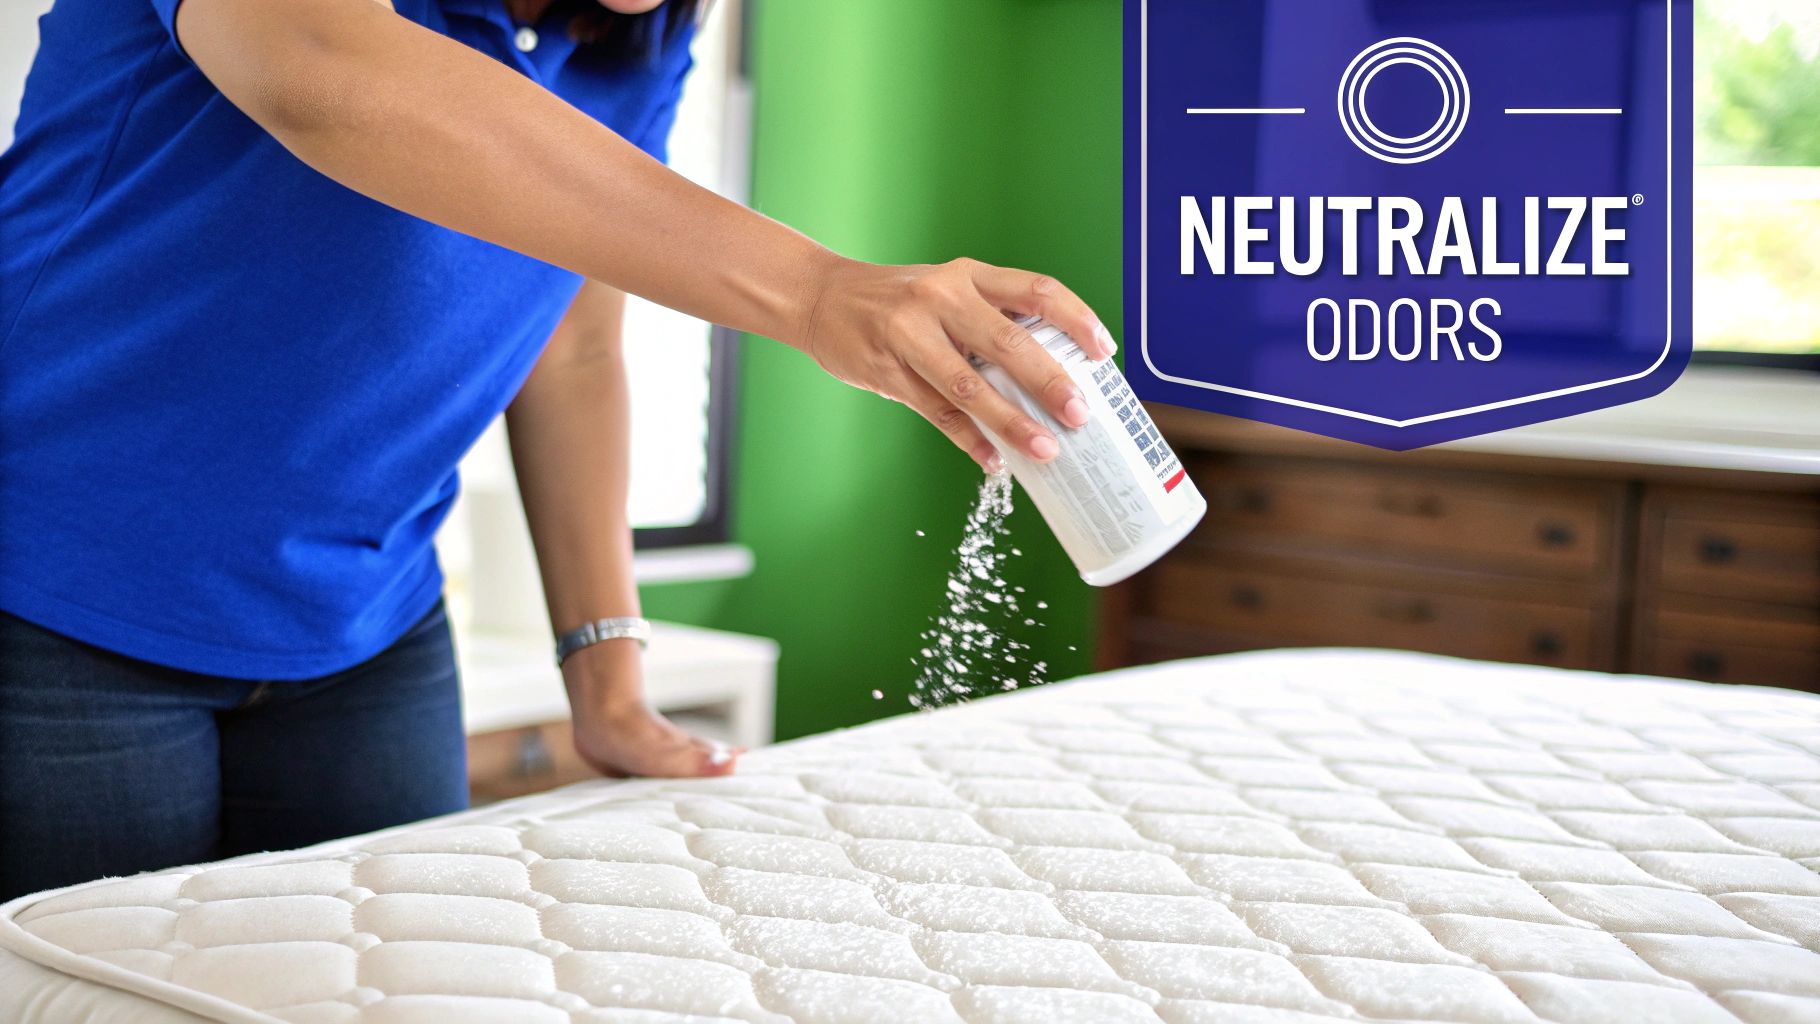
Next comes the essential deodorising phase, and for this, we turn to bicarbonate of soda (baking soda). Sprinkle a generous, thick layer over the entire damp area. Don’t be shy with it—the bicarb soda is going to pull double duty, absorbing any lingering moisture and neutralising any remaining odour. Leave it to sit for as long as possible, at least 8 hours, but I find that overnight is even better.
This simple infographic outlines the core process I’ve been talking about.
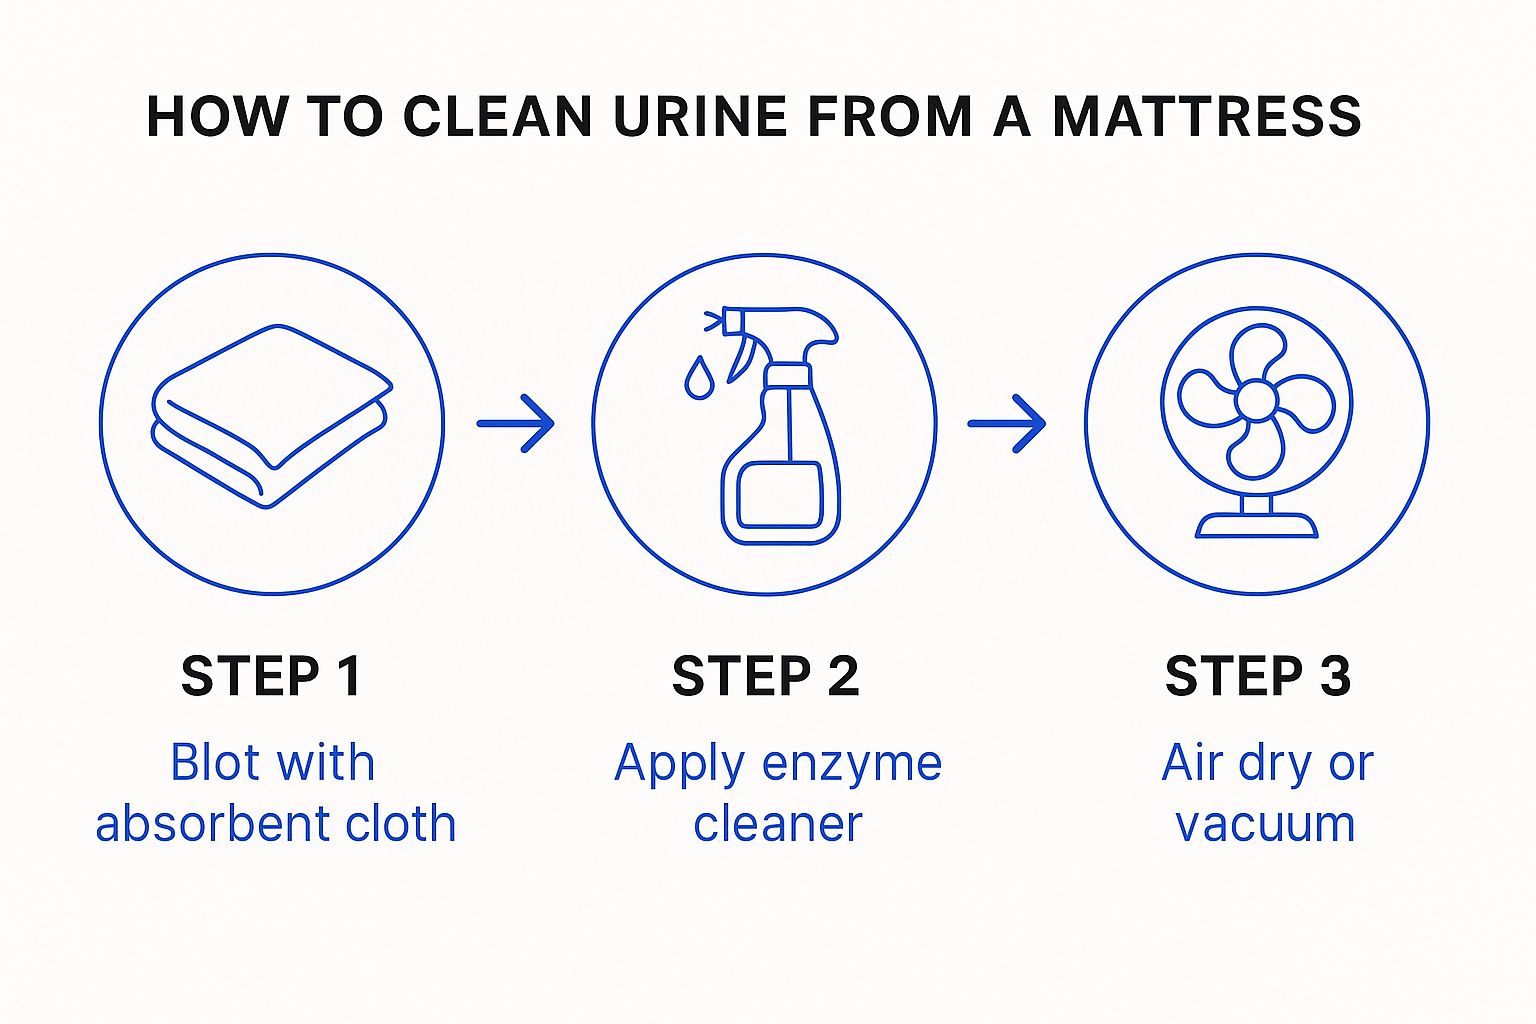
As you can see, a successful clean involves a clear sequence of blotting, treating, and drying. Nailing this process is fundamental to preventing permanent stains and odours.
Ensuring a Bone-Dry Finish
After the baking soda has worked its magic, it’s time to vacuum it all up. Use your vacuum’s upholstery attachment and go over the area slowly and thoroughly. I recommend coming at it from multiple directions to ensure you get every last bit of the fine powder. You’ll be vacuuming up the bicarb soda along with the odours it has absorbed.
The final step is arguably the most important: drying. A damp mattress is a breeding ground for mould, and that’s the last thing you want. To ensure it’s completely dry, you need to promote good airflow.
- Open any windows in the room to get air circulating.
- Set up a fan and aim it directly at the damp patch.
- If you can, let direct sunlight hit the area. UV rays are a fantastic natural sanitiser.
Never put sheets back on a mattress until you are 100% certain it is bone-dry to the touch, even deep down. Pushing your hand firmly into the spot is a good test. If you feel any coolness or dampness at all, give it more time.
This application and drying method is really effective for fresh accidents, but dealing with older, set-in discolouration can be a lot more complex. For a deeper dive into those tougher challenges, you can check out my guide on how to get stains out of a mattress for more advanced techniques.
Handling Tough Stains and When to Call an Expert
Sometimes, no matter how much elbow grease you put in, a faint odour or a stubborn yellow stain just won’t budge. This is especially true for an older accident that’s had time to really set in. Over my 15 years in the mattress cleaning industry, I’ve seen countless cases where home remedies just can’t get the job done. The real enemy here is uric acid, which bonds tightly with the mattress fibres over time.
If you’re facing a tough, old stain on a light-coloured mattress and want to give it one last DIY shot, you can try a more potent mixture. A little hydrogen peroxide, a drop of liquid dish soap, and some baking soda can sometimes do the trick. But a word of caution: you must patch-test this solution on a hidden spot first. Hydrogen peroxide can act like bleach on certain fabrics and you don’t want to make things worse.
When Home Remedies Reach Their Limit
There comes a point where household solutions have done all they can. Knowing when to throw in the towel and call a professional is key to protecting your mattress and making sure it’s genuinely clean and hygienic. It’s a common problem, especially for families. In fact, bedwetting affects roughly one in every five Australian children, which means a lot of mattresses are at risk of deep contamination if not handled correctly. The Continence Foundation of Australia offers a helpful guide on bedwetting that sheds more light on this.
It’s time to pick up the phone when you notice:
- A lingering ammonia smell, particularly when the air is humid.
- Yellow or brownish stains that refuse to lift.
- The accident was a big one and likely soaked deep into the mattress core.
- You’re starting to see signs of mould or mildew spots.
As a dedicated professional serving all of Melbourne and its suburbs, from Werribee to Dandenong, my goal is to deliver an exceptional service that home remedies can’t match. My expertise is second to none, and I am committed to restoring your mattress to its best possible condition.
My Professional Approach to Tough Stains – How to clean urine from a mattress
When you call me, you’re getting more than just a surface clean; you’re getting a complete, deep sanitisation. I use industrial-strength hot water extraction machines that powerfully flush out contaminants from deep within the mattress. This is paired with professional-grade enzymatic cleaners specifically formulated to break down and destroy the uric acid crystals that cause those persistent odours. It’s a level of hygiene that simply isn’t possible with products you can buy at the supermarket.
For anyone in Melbourne and its many suburbs who needs reliable help to <strong>cle</strong&amp;amp;amp;amp;gt;an urine from a mattress, calling in a professional is the only way to guarantee a truly clean and restored result. You can find out more on my page dedicated to professional mattress cleaning and stain removal.
Answering Your Top Mattress Cleaning Questions
Over my 15 years of cleaning mattresses all across Melbourne, I’ve been asked just about every question you can imagine. People are often stressed and just want a straight answer when an accident happens. So, I thought I’d put together the most common questions I get and share the same practical advice I give my clients every day.
Can I Use a Steam Cleaner on a Urine Stain?
I get this one a lot, and my answer is always a firm no. Please don’t do it. It’s probably the most frequent mistake I see people make, and it can permanently ruin your mattress.
The intense heat from a steam cleaner will essentially “cook” the proteins in the urine stain. This process binds the stain and the smell to the mattress fibres, making them virtually impossible to get out later on. It’s much, much better to stick with the cool-temperature methods we’ve talked about.
Will These Methods Work on an Old Dry Urine Stain?
Honestly, an old, dry stain is a completely different beast. While these steps can definitely help reduce the look and smell of it, a full removal is tough.
Once urine dries, the uric acid forms into stubborn crystals that bond tightly with the mattress fibres. A vinegar solution and bicarb soda might make a dent, but they often can’t fully break down those deeply embedded crystals. For old, set-in stains, your best bet is almost always a professional extraction with powerful enzymatic cleaners. That’s usually the only way to get it completely gone.
It’s worth remembering that accidents happen, and it’s more common than you might think. Incontinence is a major issue in Australia. According to the Australian Institute of Health and Welfare, around 545,000 Australian adults, which is 2.8% of the population, deal with severe incontinence. You can read more about these findings on incontinence in Australia at aihw.gov.au.
How Is This Process Different for a Memory Foam Mattress?
You can use these methods on memory foam, but you have to be incredibly careful with how much liquid you use. Think of memory foam as a super-dense sponge. It will trap moisture deep inside, and that’s a fast track to mould and mildew problems.
- Use liquids very sparingly. A light mist of your cleaning solution is all you need.
- Blot, blot, blot. Get to it straight away and don’t let any solution sit for long.
- Drying is absolutely critical. Be prepared to give it extra time. Point a fan directly at it and make sure there’s plenty of airflow.
A great way to avoid the stress of having to <strong>cle</strong>an urine from a mattress, particularly if you have pets, is to be proactive. Investing in something like waterproof pet bedding can make a world of difference.
How Long Does a Mattress Take to Dry Properly?
This is a crucial step, and the time it takes can vary a lot based on the humidity and airflow in your home. Realistically, you’re looking at anywhere from 8 to 24 hours.
Whatever you do, never put sheets or a mattress protector back on a damp mattress. Be patient. To speed things up, crack open the windows and get a fan blowing directly on the spot. A little patience now will save you from a much bigger headache down the track.
If you’re in Melbourne or any of its many suburbs and that stain just won’t budge, or you simply want the peace of mind that comes with a professional deep clean, Mattress Cleaning Melbourne is here to help. With 15 years of hands-on experience, I’ve got the right equipment and know-how to get your mattress truly hygienic again. Get your free quote today.
Related Post
How to Clean a Mattress: Real Techniques That Actually Work
Master how to clean a mattress with honest advice from cleaning pros. Skip the basic [...]
Dealing with mould on a mattress
Dealing with mould on a mattress. Today I visited a client who lived in an [...]